
Colorado Mountains is the first level in Syphon Filter 2, which is based in the Rocky Mountains, Colorado (located in the United States). Before the mission begins, Gabriel Logan as well as Jason Chance and John Ramirez are flying a C-130 transport over the mountains carrying a set of Data Disks on their way to a landing strip in Arizona until they're shot down by Agency Fighters, forcing the surviving CBDC agents to scatter across the mountains via parachute.
Prior to Mission Start
Following the incident with Erich Rhoemer launching a nuclear missile over Kazakhstan, Gabriel Logan as well as other CBDC agents investigate the remaining Pharcom Warehouses in Alma-Ata. They obtain a set of Data Disks containing Pharcom's backup data and Jonathan Phagan's personal files, which they intend to transport to a landing strip on the White Mountain Apache Reservation in Arizona. Before long Dillon Morgan as well as Steven Archer and Derek Falkan arrive to secure the disks. They also intend to capture Lian Xing, who was infected with the virus during her imprisonment by Rhoemer.
As Gabe is in contact with Lian, she suddenly falls unconscious (likely knocked out from behind) and he orders John Ramirez to bring the disks to the silo until the transport is ready. Fearing the worst, he makes his way to her location killing various Agency operatives along the way only to arrive too late. Morgan and Elsa Weissinger are shown on one of the Black Hawks, with her checking if she's been infected with the virus. After confirmation, Morgan intends to eliminate Logan as well but Archer informs him that the Russians have arrived so he decides it better to leave and finish him later.
Uri Gregorov arrives with his forces and apologizes that their aide arrived too late. He explains that he and Lian are old friends, inquiring if they would kill her now that she's been captured. Logan tells him that as long as he has the data disks, they won't harm her and Gregorov tells him that the Kazakhs are on the way, so it's best if they disappear as quickly as possible. With the airstrip cleared, he tells Chance it's time to move out and the C-130 transport takes off.[1]
Summary of Events
As the C-130 transport explodes, Gabriel Logan as well as the surviving CBDC Agents parachute into the Rocky Mountains below. Gabe lands and meets up with Kowalski surrounded by two other agents, learning that he was injured in his landing forcing his leg to be broken in two places. Gabe leaves Kowalski with the other two and moves up the ridge, coming across a Private who is trying to contact other CBDC operatives. He tells Gabe he's unable to pick up anyone just yet and tries for Lieutenant Jason Chance (who has the Transponder Locator), coming across Davies instead who confirms he just saw the Lieutenant and asks that they meet up with him.
Daviess leads the two to a cave, where he and the Private stay behind as Gabe goes in. He comes across Eschelman and John Ramirez, with Eschelman informing Gabe that Chance is just beyond the cave. Gabe cautions Eschelman about the instability of the cave before leaving, asking him to be careful. When he comes across Chance, he receives the Transponder Locator which he can use to get a location on the Data Discs left in the tail-section of the C-130. He tells Chance to go on ahead, speaking to Teresa Lipan via radio who informs him that The Agency has sent in Spooks to his location, lead by Steven Archer. Gabe remarks that he was a "young brown nose" fresh out of the academy that he once served with in Guatemala, before spotting and killing one of the first parachuting Spooks.
On his way back through the cave (to find an area to use the Transponder), Eschelman spots a Spook behind Gabe and attempts to shoot him, only to be caught by the enemy's M-79 grenade blasts, with the cave collapsing on top of him. Gabe and Ramirez are able to escape backwards through the cave, with Gabe telling Ramirez to stay here to keep anyone else out of the cave. Gabe informs Ramirez that Kowalski had C4 on him (as he told Kowalski to grab it before they jumped from the plane), which could clear away the rubble and get him back to where Chance ran to. He then exits out to find Daviess and the Private in firefight with more spooks, before spotting a grenade just before it explodes killing the both of them. Gabe fights his way first to Kowalski, who he finds dead against the wall (with the other two agents killed as well). He retrieves the C4 and again fights his way to a location where he can use the Transponder. After successfully procuring the coordinates of the crash site for the C-130, he returns to the cave where he clears out the rubble.
With the rubble gone, he and Ramirez make there way back into the area where Logan ran into Chance. Ramirez goes on ahead as Gabe intercepts a transmission from Steven Archer that the F22s are returning to the McKenzie Airbase for fueling and maintenance, with only 2 hours remaining before they return and gas the entire mountain. He later catches up with Ramirez who has found Ferguson and the two of them have been pinned down by snipers. Gabe helps the two agents survive, taking out the survivors and later reinforcements as he leaves them on the mountain to go on ahead towards the highway. Just as he heads down a hill, Archer arrives in his Black Hawk and fires a missile towards Logan, destroying the path and sending Logan tumbling down towards the highway (losing his equipment along the way).
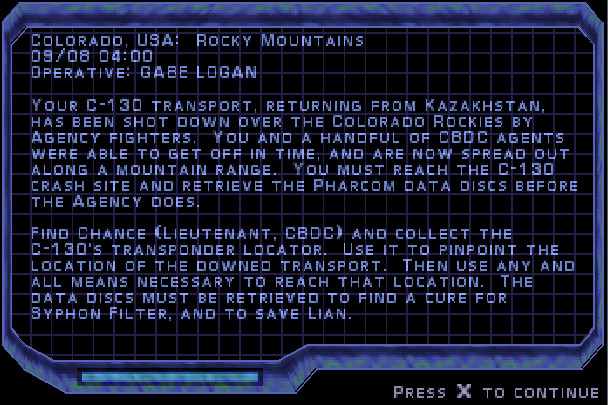
Mission Briefing
Environment
The Colorado Mountains is a mission that occurs at nighttime, like many of the other missions throughout the games. The location is nature-formed, so expect a lot of hills while moving. As the temperature is relatively low at this altitude snow is seen falling across the mountaintop and can somewhat limit visibility. Due to the color scheme in this level as well as the way it's structured, it can be sometimes difficult to see an enemy as their outfits in this level in particular let them blend in to the terrain.
Objectives
- Find Chance and the Transponder Locator
- Reach High Ground to fix Transponder Signal
- Recover C4
- Clear Cave In
- Take Out Snipers
- Defend GI's
- Reach the Highway
Parameters
- Don't kill any GI's
Weapons
- Starting Weapons
- 9mm
- Knife
- H11
- One is located directly above Kowalski at the start of the level, you have to navigate the parachute in a way that gives you the momentum to get onto the cliff that he's laying against.
- After you run into Chance, if you walk backwards you'll drop to catch onto the ledge. Drop once more to land inside a cave, the H11 is near the back. This is all near the waterfall and gap you have to jump (that Chance jumps too). To get out, simply walk to the edge, face where the H11 was and hit Triangle.
- The Sniper Spooks also carry this, having deadly accuracy.
- Air Taser
- One is located just west of where you need to use the Transponder Locator, behind a rock facing a cliff's edge. If you move backwards beside the rock, you'll grab onto the ledge and can drop safely to a hidden ledge just behind the rock where it's located.
- M-16
- Shotgun
- Located in a crate next to where you leave Daviess and the other GI. In going towards where you'd use the Transponder Locator, it's to the direct left of hopping up on this ledge.
- Grenades
- Located in a crate next to one of the Sniper Spooks just before the end of the level, can be used to make the next few enemies easier.
Enemies
- Spook
- Carrying: M-16, Flak Jacket, H11
Characters
- Gabriel Logan (player)
- Jason Chance (ally)
- John Ramirez (ally)
- Kowalski (ally, killed by Agency)
- Two unnamed GI's, killed alongside Kowalksi
- Davies (ally, killed by Agency)
- Unnamed Private, killed alongside Davies
- Eschelman (ally, killed by cave collapse)
- Ferguson (ally, wounded)
- Teresa Lipan (ally, radio contact)
- Steven Archer (enemy, cutscene)
Walkthrough
As soon as the mission starts, you'll be floating down via parachute. If you want to hurry through the level, just land to the left next to a CBDC agent who is trying to contact everyone else via radio. If you would like a strong weapon early on, position your flying to the top right corner (near a giant rock with an agent laying against it) and try to get yourself up on top. If you don't make it, simply hit Pause and Restart at the last checkpoint until you reach it. You'll find the H11 here. Also, if you wish, you could drop down and see a small cutscene involving Kowalski.
There is also an M-16 located near the Private on his radio. If you climb up and go right, looking towards the cliff at the opposite end of where you got the H11 there is a crate holding the M-16.
Despite whether you chose to get the guns or not, go to where the agent is kneeling down using his radio. After a short scene, follow him through a cavern to meet up with another agent who will tell you to go through the caves to find Chance.
You can enter the caves if you wish...or grab two more weapons. Head to the left (up the hill basically) and stay left to find a crate with a Shotgun in it. Move a little further, go right and you'll come across a rock facing the cliff's edge, to the left a large tall rock can be seen in the distance (you'll need to come there later). At the smaller rock, move to the right side of it (facing away from the cliff, so back towards it) and you'll drop, grabbing the ledge. Drop once more to land on a hidden ledge with a crate containing the Air Taser, now return to the cave area. (Note: Alternatively, if you come to the ledge in a crouching stance you'll automatically climb down.)
On your way through the caves you'll run into yet again two more Agents and after the short scene, you'll find chance down near a gap in the ground. He'll give you the Transponder Locator and run off, with the first enemies in the game parachuting to your location. If you have the H11, you can kill them relatively quickly before they even land with a headshot. If not, you could also use the air taser or your 9mm. Make sure to pick up the M-16 they drop, which can help for more of the enemies further ahead.
On your way back through the caves, Eschelman will begin firing at the enemies coming from behind you and will cause the cave to collapse behind you and Ramirez. In order to get back here you'll need to grab C4, which is held by Kowalski (seen at the start of the level, leaning against a rock). First you'll want to exit the cave, where you'll see the two agents you left earlier in firefight with more Spooks and they'll both be killed by a grenade. Keep an eye out for this enemy, if you get hit by one grenade you're dead. Take out each of the enemies in this area with headshots/target-locked shooting and make your way towards the cliffside (going uphill to the right of where you exit the cave). Note: Enemies will keep respawning, so be constantly on the lookout as you move forward. If you are damaged too much, there is a Flak Jacket located in a crate ahead.
As you progress, you'll see a lone soldier talking on the radio to his commander. You can choose to run in shooting him and his compatriot around the corner...or you could sneak behind him and kill using your knife. Whichever method you use, beware that any one of these guys could carry grenades so be on the lookout as you dispatch everyone. Afterwards, simply get up to the highest point of the tall rock structure where you'll be able to use the Transponder.
With that out of the way, return to the beginning of the level where now several Spooks are present. Deal with them how you like and you'll find only Kowalski dead against the wall. A small scene will occur and you'll obtain the C4, make your way back (fighting any paratroopers that fly in) and back into the caves where Ramirez is waiting for you. (If you become damaged, there's a Flak Jacket located in a crate south of where Kowalski is). Use the C4 and run away from the rocks until the timer counts down and blows them away. Continue on towards where Chance jumped the gap earlier.
A cutscene will occur and Ramirez will run off, with four paratroopers flying in. One will appear to your immediate right and likely start chucking grenades, so it's best to kill him first before focusing on the three centered around the gap. After all four are dead, continue on.
If you're low on ammo for you H11, go to the gab from the entrance's side and walk backwards, dropping to a hanging position. Drop once more and you'll enter a cave with another H11 in a crate. To get out, walk to the end of the cave and face the crate, then hit Triangle.
Either way, jump the gap and head into the second cave...jumping once more on the left to reach an area where you'll notice a "Head Shot" logo over your head with your map and weapon flashing red. Immediately start rolling towards the two agents otherwise you'll likely be killed on the spot. They explain that they're pinned down by two snipers and Gabe tells them to create a distraction. While they're creating the distraction, run to the right behind the huge rock structure (where one of the snipers is) and climb up. He'll scream that he's being flanked, with the other telling him to pull back.
As he's running away, you can try to shoot him in the head (he's wearing a Flak Jacket and so is the other one, so body shots won't work) or wait until he stops and turns around (he will walk, giving you plenty of time to shoot). Once he's dead, duck behind the rock with the crate on it (which holds Grenades) and peek around the corner to take a shot at the other sniper's head. Alternatively, you can run along the path the other sniper took and peek around the corner here for an easier shot. After both are dead, progress towards where the second sniper hid and move down the hill to be informed of a new objective: protect the GI's.
Roughly 6 soldiers will appear all wearing Flak Jackets. Thankfully none of them use H11's, so all you have to do is duck behind the cover the second sniper was using and shoot the ones on the far left. When only the one on the bottom remains, peek around the corner for an easy headshot and that will end this section. After a short cutscene, just run down the hill and the mission is complete.
Tricks and Hints
- The H11 located above Kowalski is good to pick up so that you have a good, long ranged weapon ready when the first Spooks arrive. You can use it to take out a majority of them and you can pick up the second H11 (in the secret cave next to the water fall) on your way to the final area of this level, where you would be faced with several snipers.
- If you'd rather not waste ammo, the Air Taser found near where you have to use the Transponder Locator makes a good alternative as it's a long ranged weapon that will kill any enemy it's attached to after about 5 seconds. The only downfall is that you will be open to fire until that point, so make sure you're in a good position so that you're not in the line of fire.
- Also, for the Flak Jacket wearing enemies at the end of the level, shoot it at their head because otherwise it will be deflected.
Trivia
- This is one of few levels that introduces "parachute" controls, across the first three games. It is also the first in the series to do so.
- This level features enemies that drop from parachutes as well, that can be killed long before they land (however this may forsake whatever weapon they were carrying if they end up falling off the cliffs).
- Almost all the ally characters, despite having names, are labeled "GI".
- When you first start the level, there's a Private who is trying to radio his comrades. If you avoid running into him and instead enter the cave, you'll get a different scene with Daviess who will tell you that the lieutenant was further ahead. Afterwards, everything plays out the same and even the Private shows up running through the cave to stand where he would have been otherwise.